

This guide is based on the supplied 2M2 Tank demonstration video. It shows how a Yale key is cut from bitting data: identify the job, select the residential-key workflow and matching Yale profile, follow the clamp guidance, secure the blank, enter the depths, and let the CNC machine complete the cut.
VIDEO DEMO:
What You Need
- 2M2 Tank CNC key cutting machine
- Matching Yale key blank
- Correct Yale profile/specification
- Accurate bitting/depth data
Step 1: Check the Yale Key and Cylinder
The video begins with the Yale key/cylinder used for the demonstration. Confirm the key type and the job before selecting data in the app.
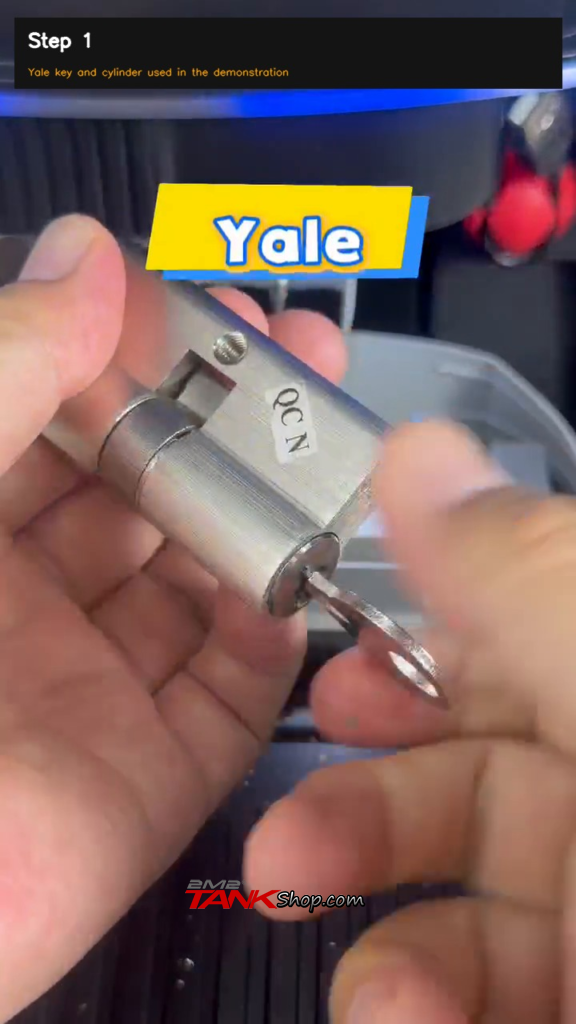
Figure 1. Yale key and cylinder used in the demonstration.
Step 2: Prepare the 2M2 Tank Machine
Prepare the machine and make sure the cutting area and clamp are ready for operation.
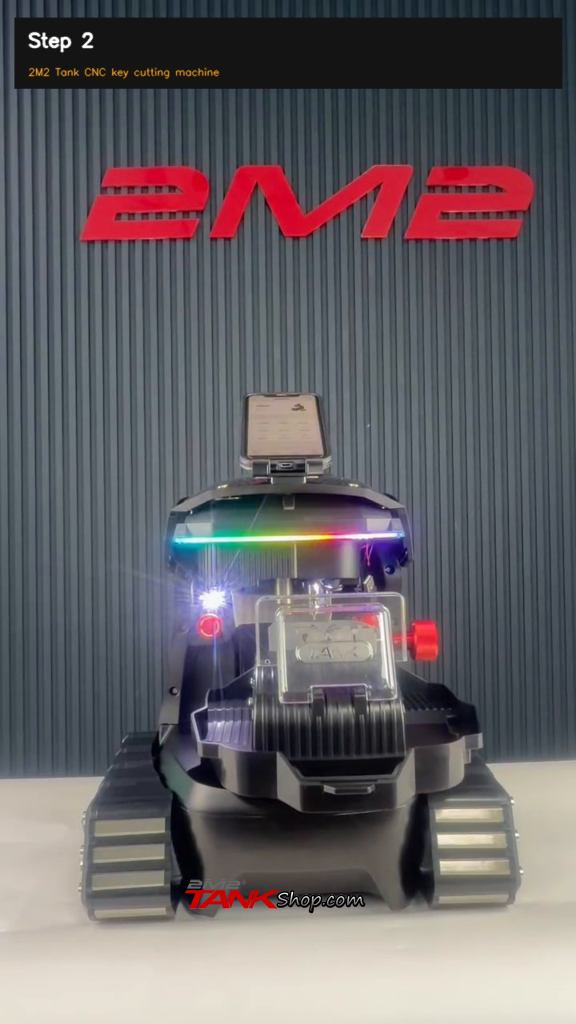
Figure 2. 2M2 Tank CNC key cutting machine.
Step 3: Choose Residential Key
In the app, enter the residential-key workflow to access the relevant household key database.
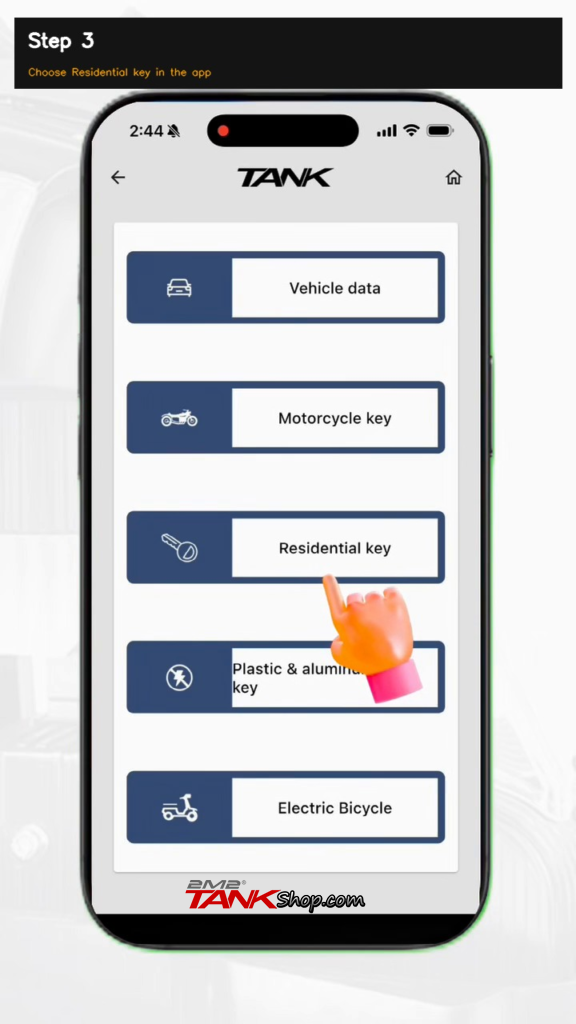
Figure 3. Choose Residential key in the app.
Step 4: Select the Matching Yale Profile
Open Yale and choose the profile that matches the key blank and lock specification. The video shows multiple Yale profiles, so this selection should be verified carefully.
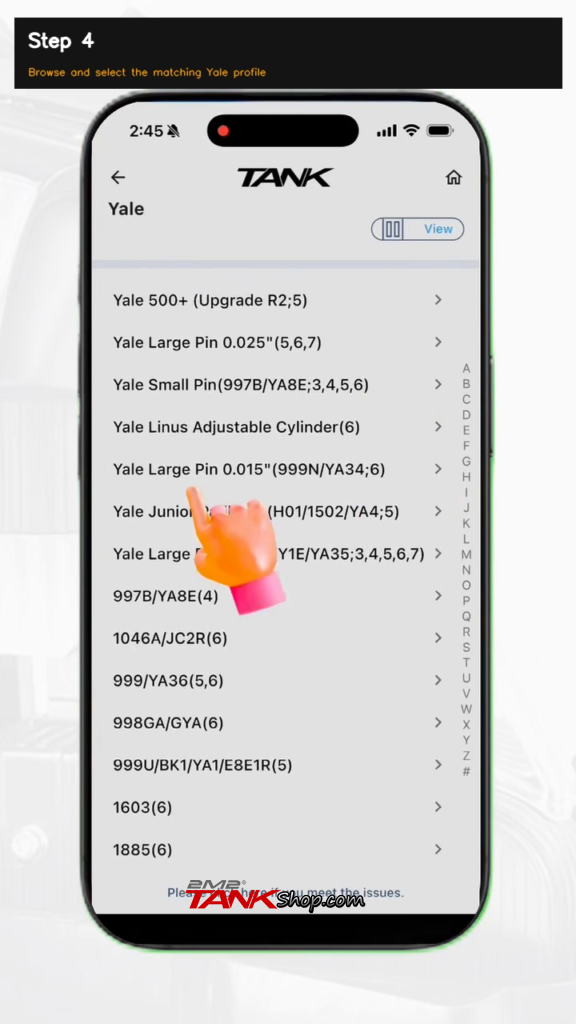
Figure 4. Browse and select the matching Yale profile.
Step 5: Follow the Clamp Guidance
The app displays clamp/positioning guidance for the selected profile. Follow the on-screen illustration before installing the blank.
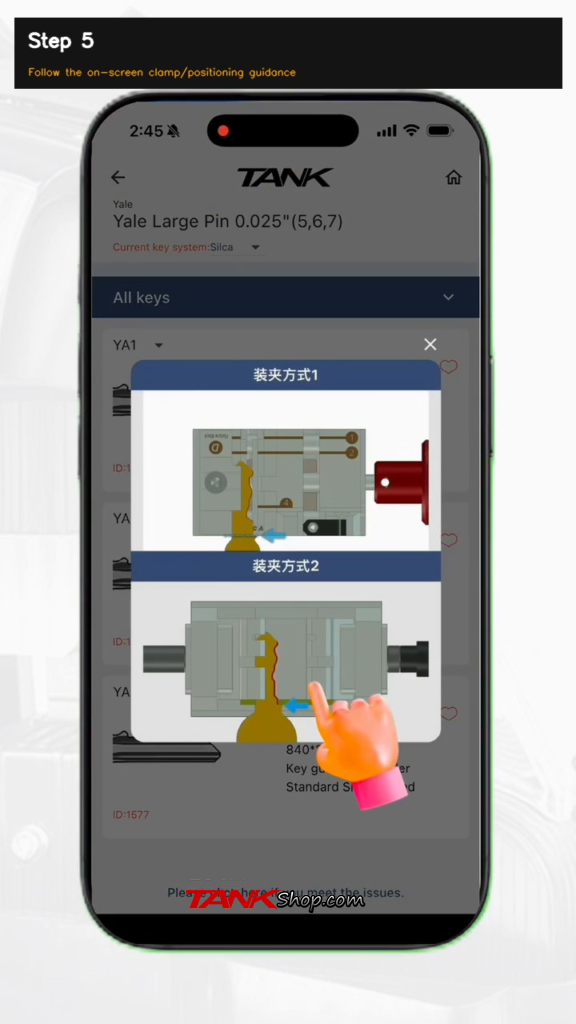
Figure 5. Follow the on-screen clamp/positioning guidance.
Step 6: Secure the Yale Key Blank
Place the Yale key blank in the indicated clamp position and secure it firmly. Incorrect positioning can affect the finished cut.
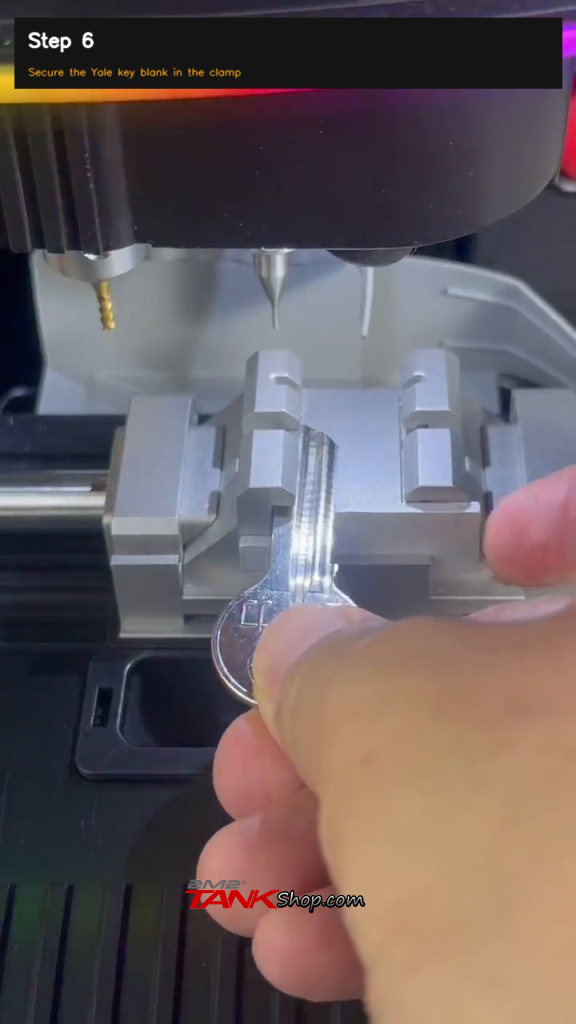
Figure 6. Secure the Yale key blank in the clamp.
Step 7: Enter the Bitting Depths
Enter the required depth/bitting values shown for the job. Recheck each position before cutting.
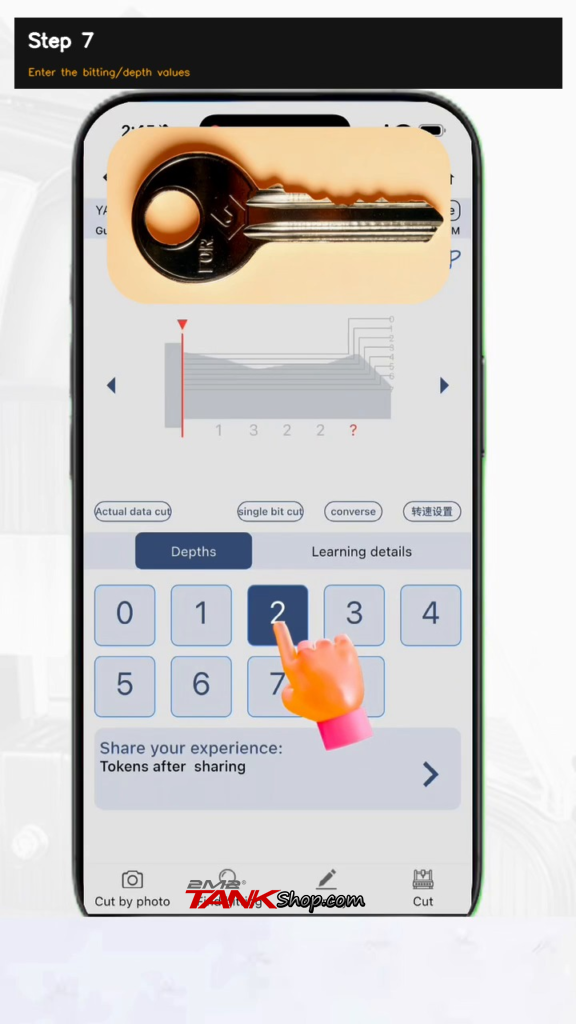
Figure 7. Enter the bitting/depth values.
Step 8: Start Automatic CNC Cutting
Start the cutting cycle. The CNC cutter follows the selected key geometry and the entered bitting data automatically.
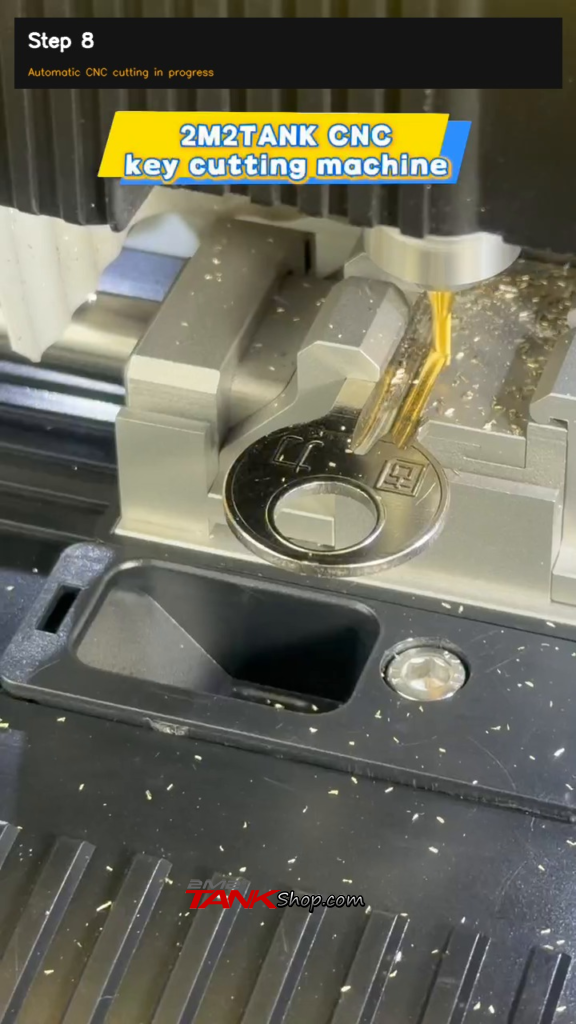
Figure 8. Automatic CNC cutting in progress.
Step 9: Inspect and Verify the Finished Key
After cutting, remove and inspect the key, clear any loose chips/burrs as appropriate, and verify the finished key with the intended lock/cylinder.
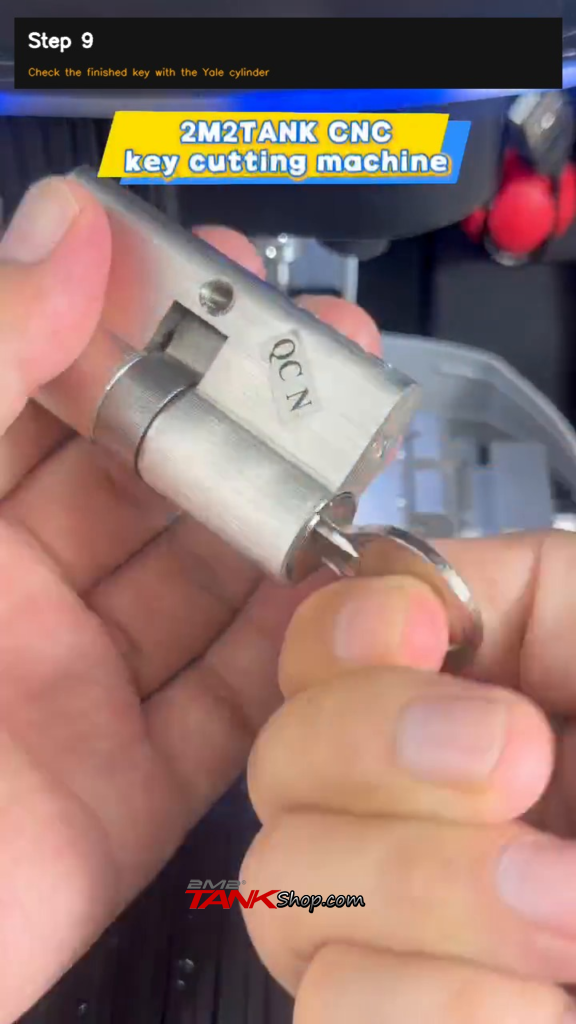
Figure 9. Check the finished key with the Yale cylinder.
Key Takeaways
- Use the correct Yale profile for the blank and lock specification.
- Follow the app’s clamp-positioning guidance before cutting.
- Double-check all bitting/depth values before starting the CNC cycle.
- Inspect and verify the finished key after cutting.
FAQ
Can 2M2 Tank cut a Yale key by bittings?
Yes. This video demonstrates a Yale key being selected in the database, bitting depths being entered, and the blank being cut by the 2M2 Tank CNC machine.
Does the workflow require the correct Yale profile?
Yes. Yale has multiple profiles in the database, so the selected profile must match the key blank and lock specification.
Why should I check the bitting data before cutting?
The entered depths determine the cuts made by the machine. Incorrect data can produce an unusable key.
Conclusion
The demonstration shows a clear bitting-based Yale key cutting workflow with the 2M2 Tank CNC key cutting machine. By selecting the correct residential Yale profile, following the clamp guidance, entering accurate depths, and using the automatic CNC cutting cycle, locksmiths can complete the job in a structured and repeatable way.